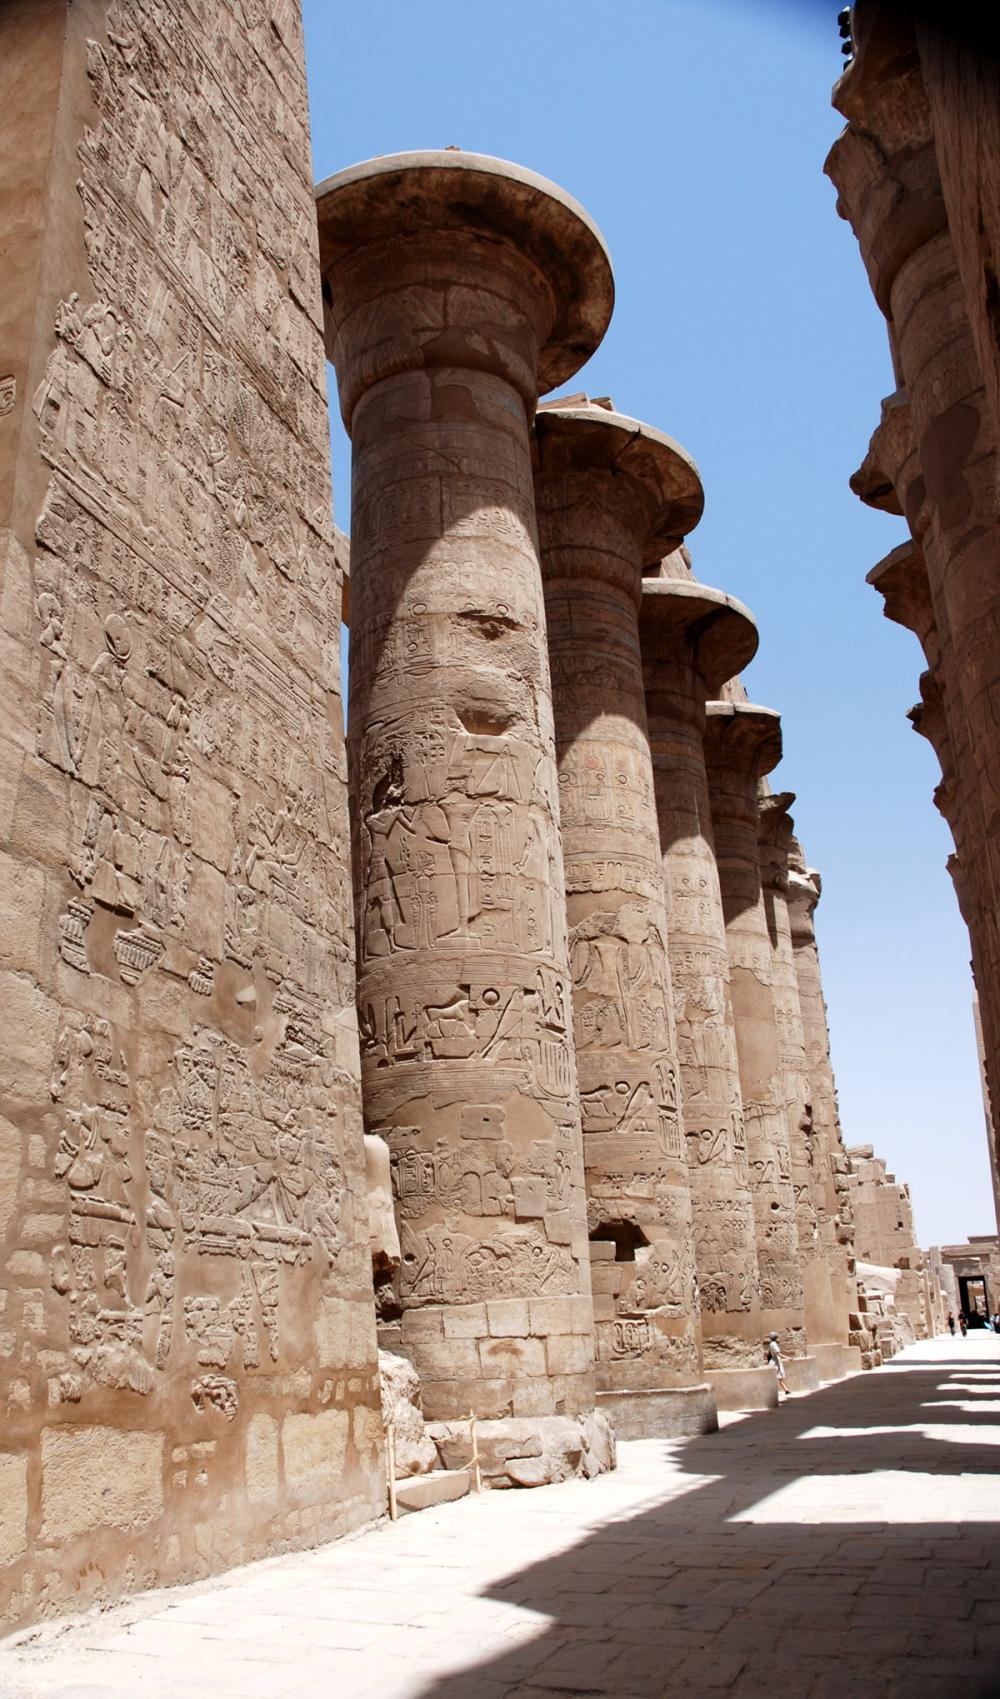
Passageway of the Second Pylon
|
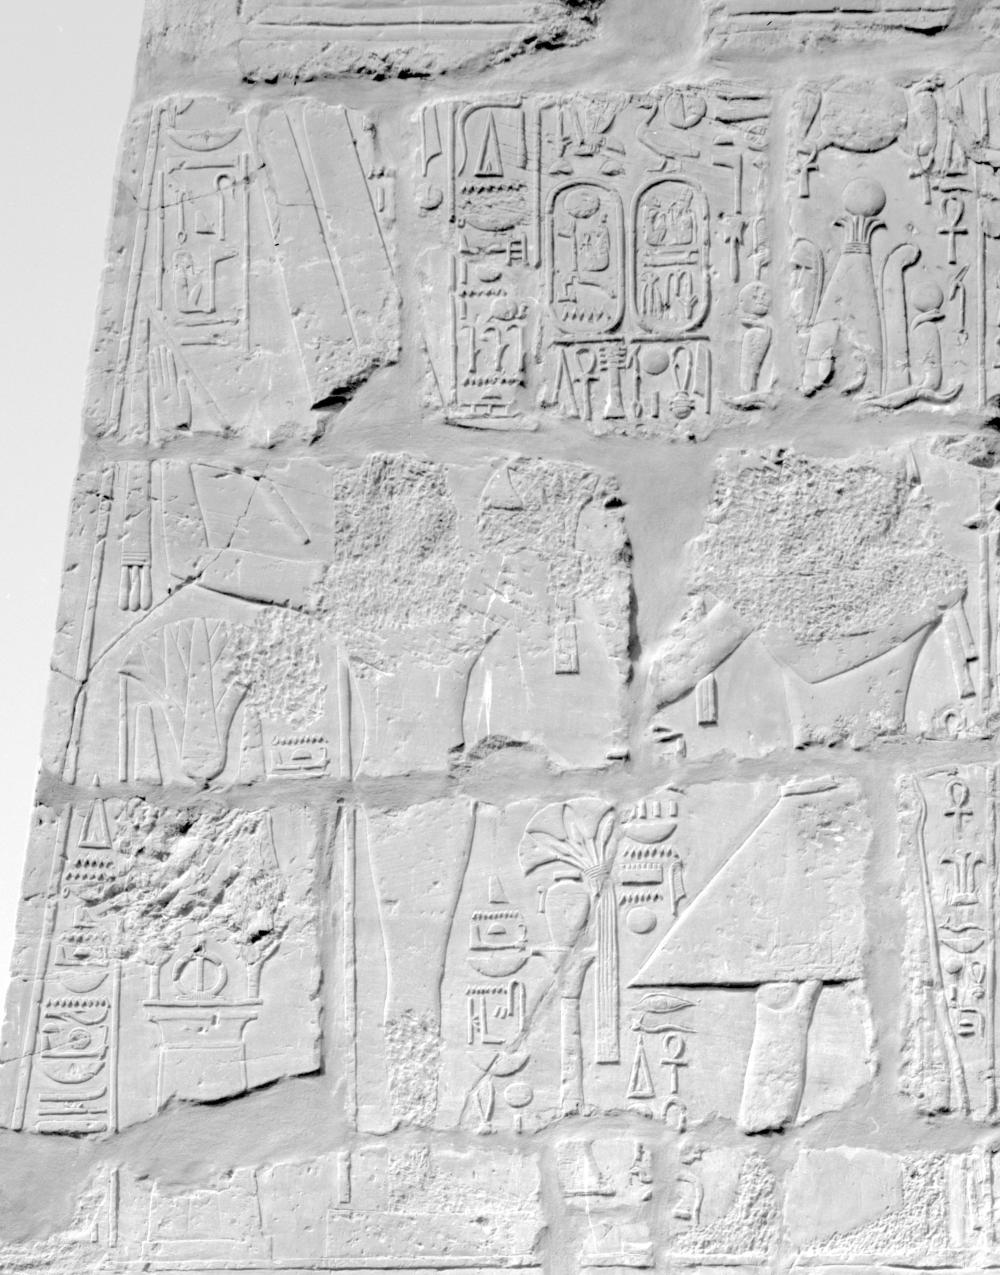
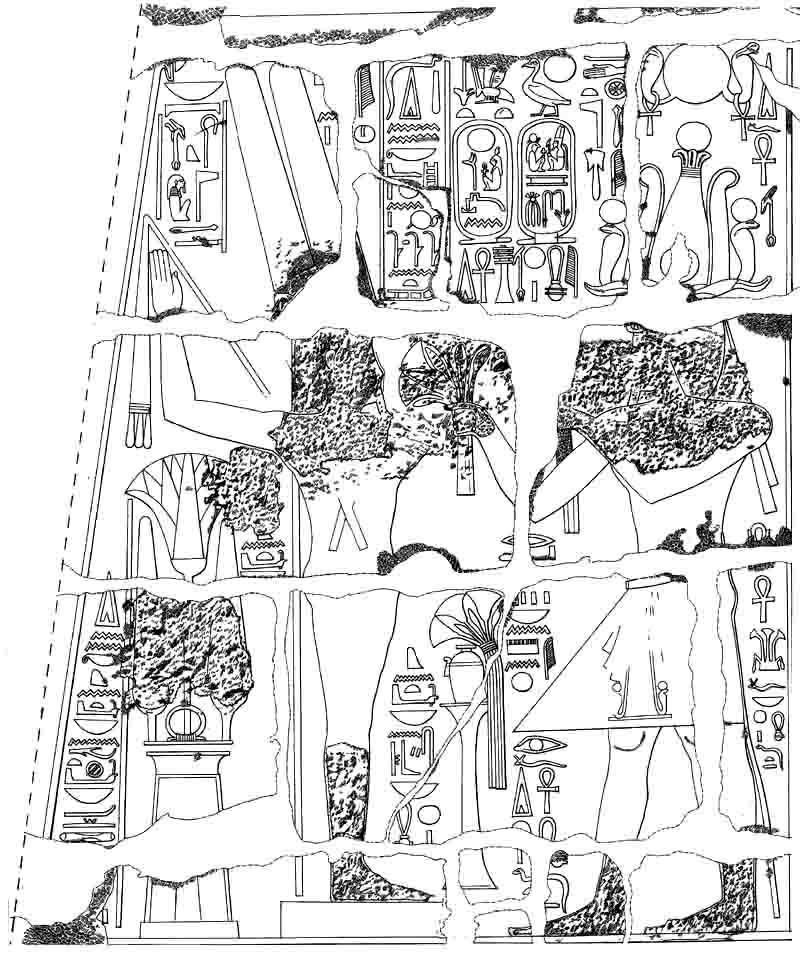
The Second Pylon forms the huge “front door”of the Hypostyle Hall. The existing reliefs are the work of Ptolemy VI (ruled ca. 180-145 BCE), but our research has shown that two earlier kings, Ramesses I (ruled ca. 1290-1291 BCE) and Ramesses II, inscribed these walls long before Ptolemy. Our recording and study of these inscriptions has given us a new understanding of the earliest history of the Second Pylon, its use, and repair made to it during the first thousand years after it was built. Between 1990 and 1997, our expedition recorded these inscriptions and we are now preparing our facsimile drawings for final publication online and in a volume dedicated to the several gateways in the Great Hypostyle Hall. When we began our recording of the reliefs, it was known that Ramesses II was not the first king to inscribe these walls, nor the last. During the first millennium BCE, disaster struck when part of the roof of the Second Pylon gateway collapsed badly damaging the reliefs on the walls below. Later, the Hellenistic pharaoh Ptolemy VI had restored the inscriptions in the eastern passageway of the Second Pylon that were most heavily damaged in the roof’s collapse.
For the most part, Ptolemy VI was quite conscientious in recreating the damaged reliefs as faithful reproductions of the damaged Ramesside original reliefs. The scenes and hieroglyphic texts that accompany them are largely identical to their lost Nineteenth Dynasty prototypes. Enough of these remained to allow the Ptolemaic sculptors to reproduce the old designs even as they carved directly over what remained of these, largely obliterating all that was left of the Ramesside decoration itself. Here and there, traces of the suppressed original carvings shine through the later Ptolemaic version as stray engraved lines embedded in the figures or even as isolated hieroglyphs or groups of signs that betray their early Nineteenth Dynasty origins by their relative flatness next to the bolder and more shapely style of the Ptolemaic hieroglyphs.
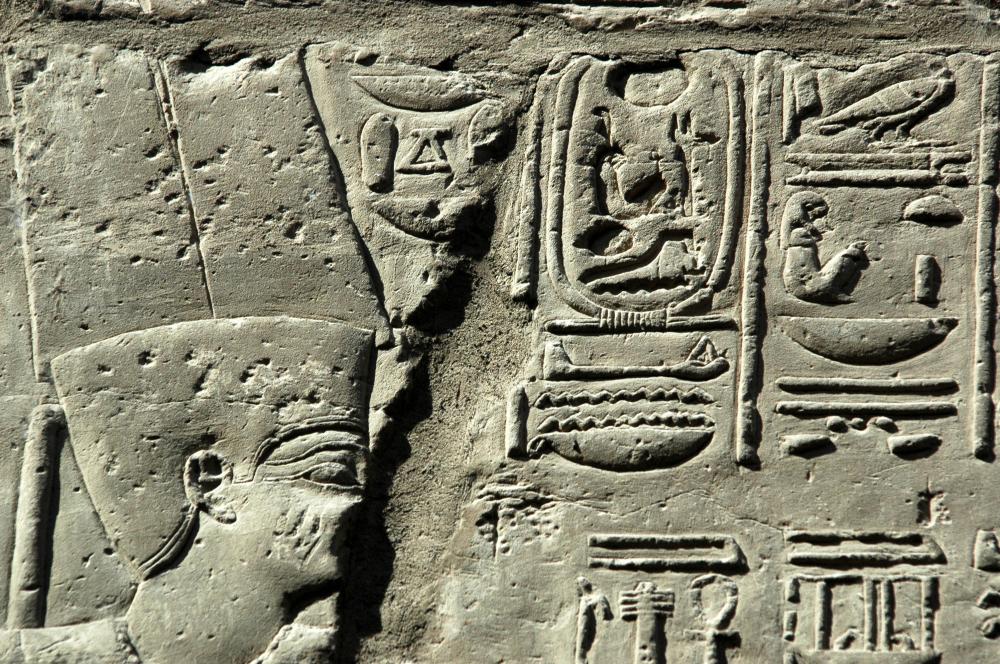
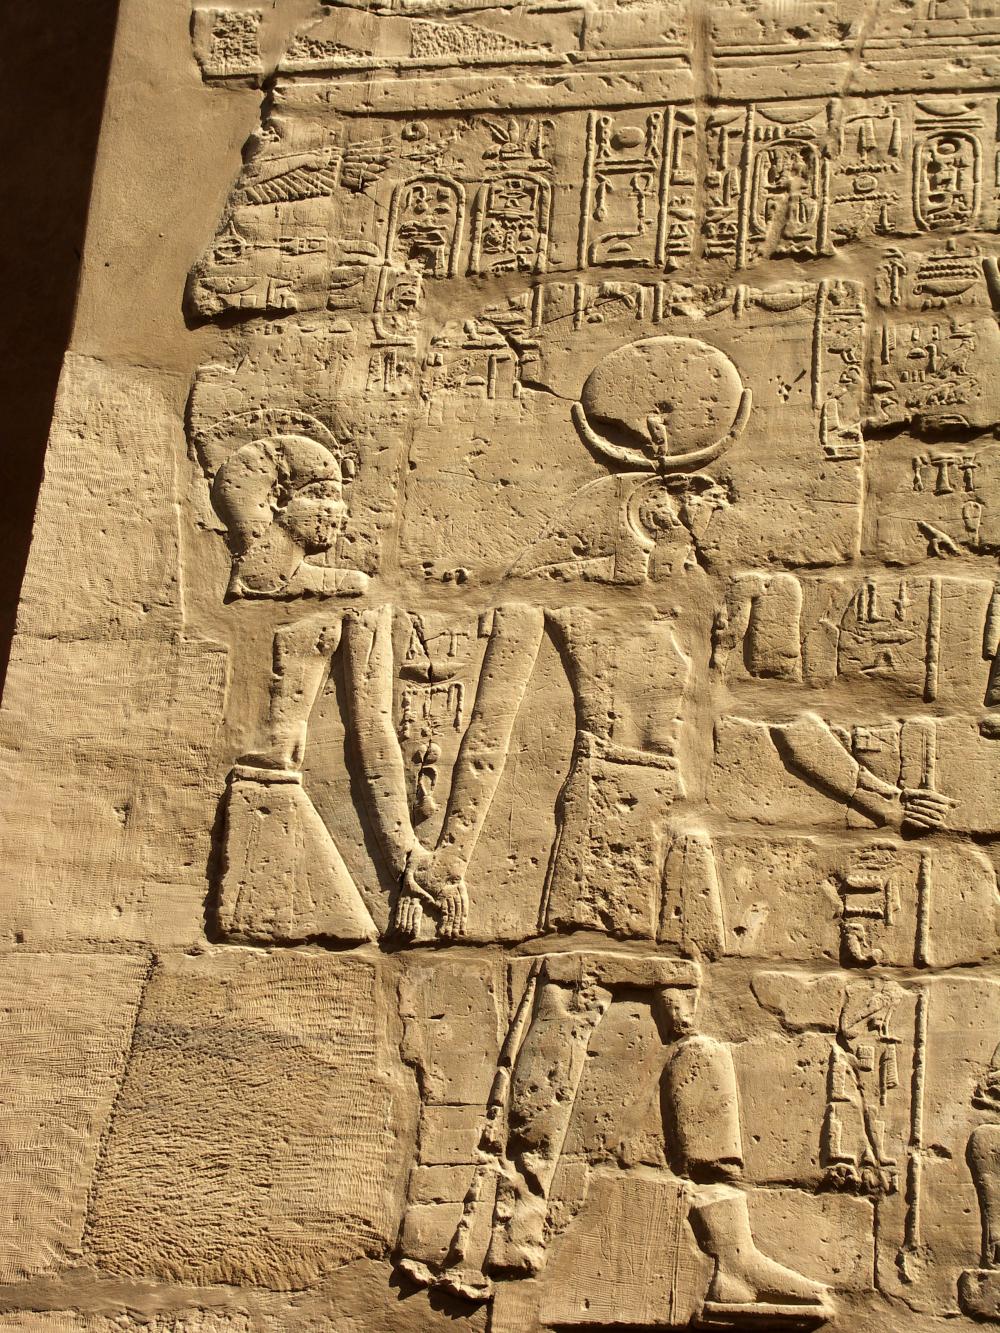
Ptolemy VI’s actions can be seen both as an act of destruction and of preservation. He largely destroyed what remained of the actual Ramesside reliefs, but he recreated almost in their entirety, the content of these reliefs. In the final versions, the king appears before the same deities performing the same ritual acts as before. Moreover, Ptolemy scrupulously carved most of the reliefs not in his own name but in that of of Ramesses II, the king whose name stood on these walls. In some cases, however, he could not resist the temptation to insert his own name and even the name of two other earlier kings— Ramesses III (ruled ca. 1184-1153 BCE) and the Kushite pharaoh Taharqa (reigned ca. 690-664 BCE)— into the recreated reliefs.
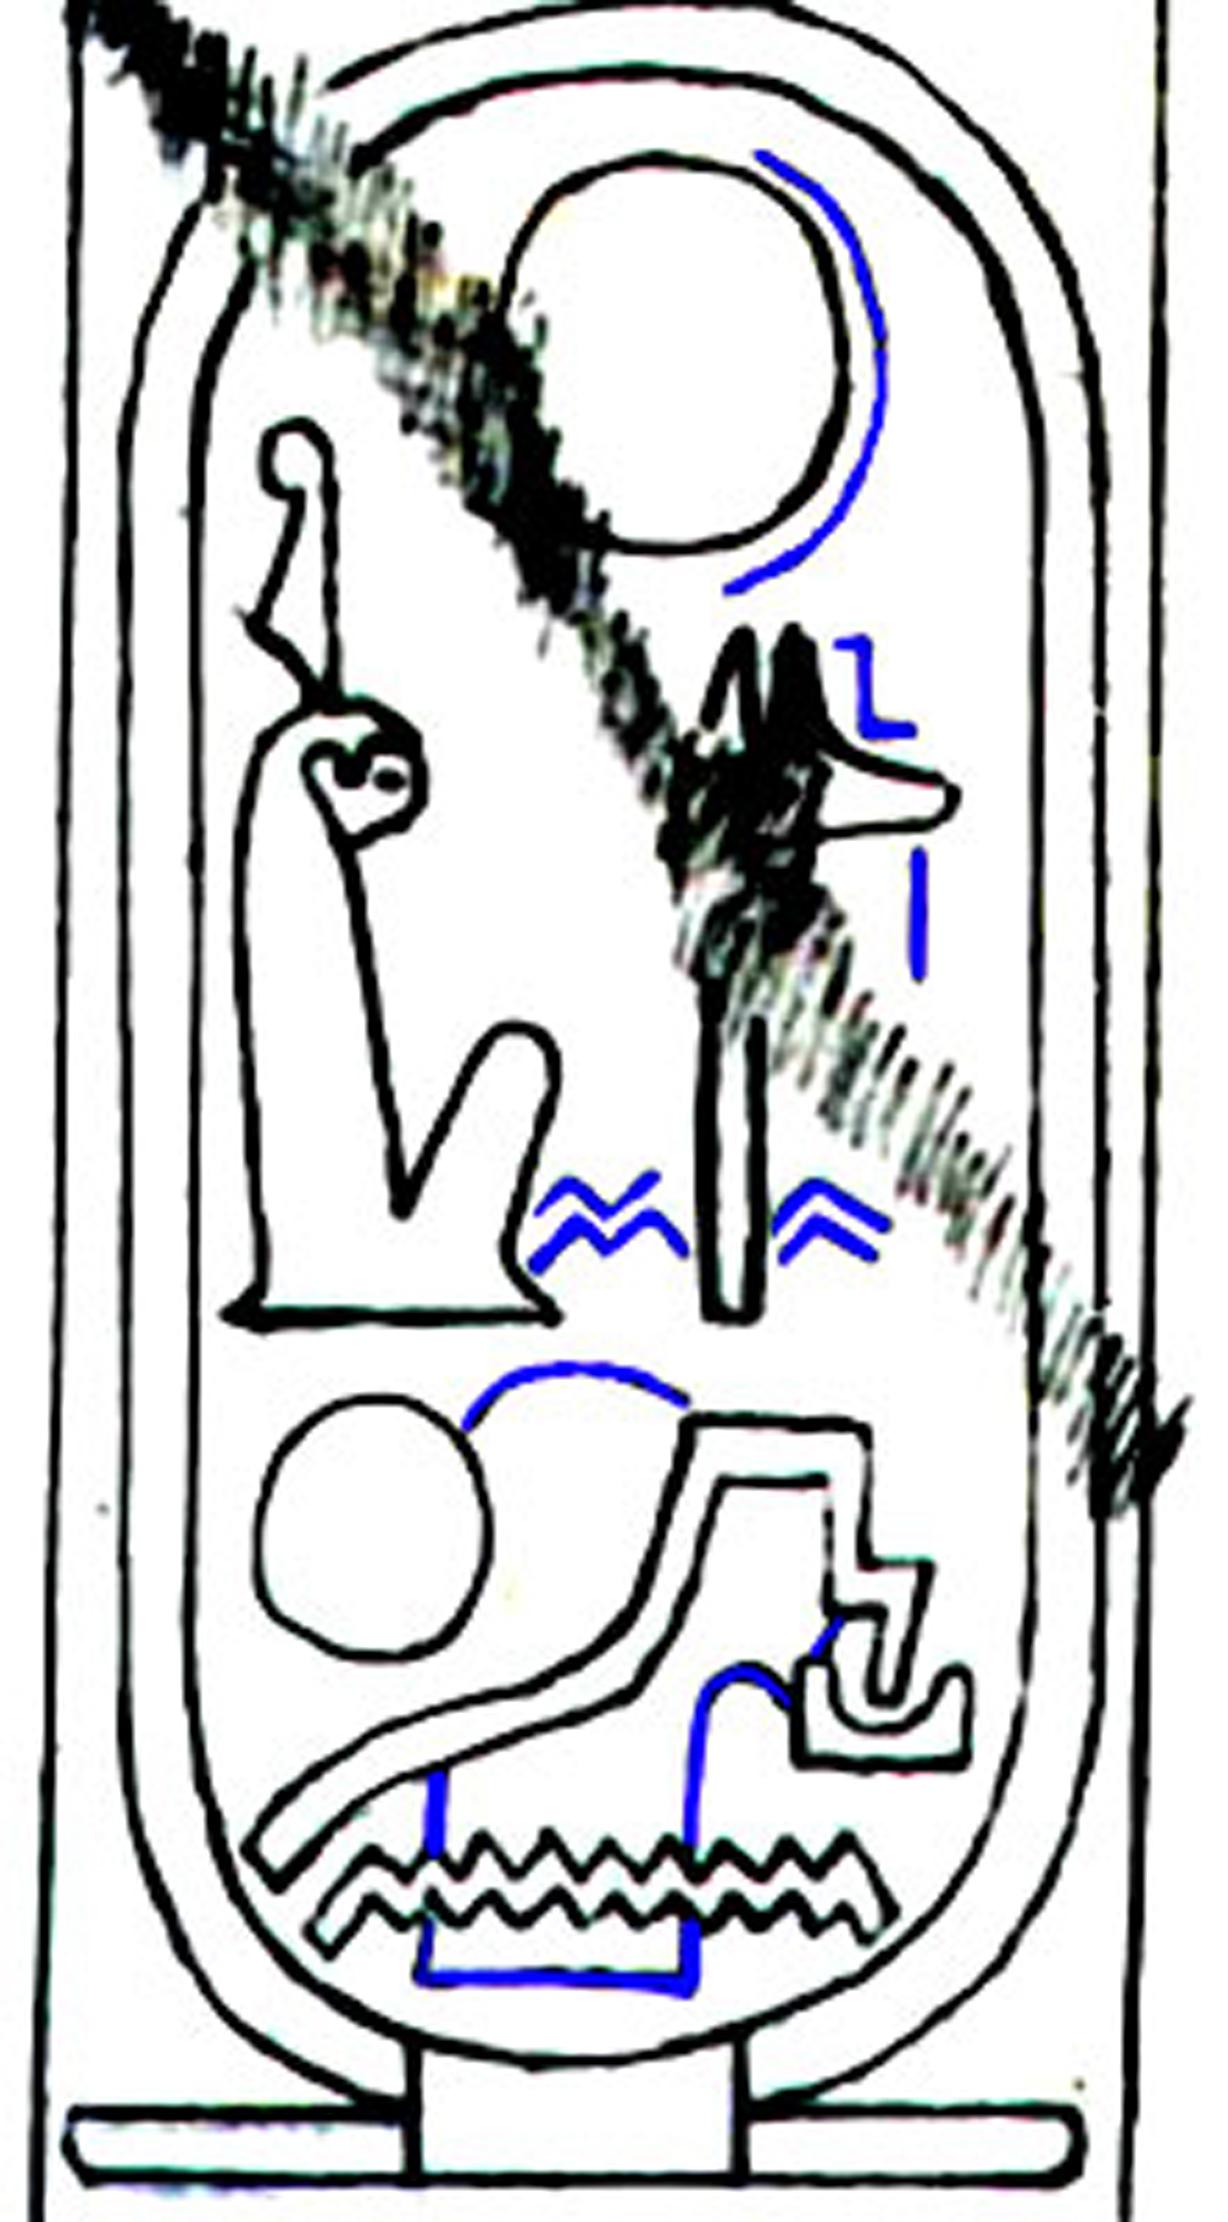
Fortunately, Ptolemy was even more historically conscientious than his predecessor Ramesses II. For Ramesses II himself had replaced the name of his own grandfather Ramesses I in these reliefs. It was Ramesses I who actually created the decoration of this passageway during his all-too-brief reign of less than two years. Several decades later, his grandson Ramesses II reinscribed all the reliefs of several pharaohs, Horemheb, Ramesses I and Sety I, with his own name where they occurred on the Second Pylon and along the main processional axis way of the Great Hypostyle Hall. Ramesses I had carved raised relief, but Ramesses II simply removed the raised glyphs of his grandfather’s name and replaced them with the signs for his own, but carved in sunk relief. Fortunately, this method of erasure and substitution left faint carved residue of the original name to be detected. After Ptolemy VI repaired these scenes, little of the original Ramesside relief was left behind. But Ptolemy was careful to leave most of the royal cartouches containing the name of Ramesses II as he had found them. In so doing, he preserved— and perhaps he did this deliberately— the faint traces of Ramesses I’s names that still cling amid the incised carvings of his grandson’s names.
Ultimately, credit for this discovery should go to Ptolemy VI himself. If he had not carefully preserved the original appearance of these usurped cartouches— when all the reliefs around them were being completely transformed— we would never have known that Ramesses I was responsible for these inscriptions. Ptolemy may even be considered the first Egyptian epigraphist, since he could apparently "read between the lines" and recognize the original author of usurped cartouches and not just Ramesses I's. Ptolemy VI inserted the names of two other kings into these inscriptions— Ramesses III and Taharqa. In doing so, he was apparently paying honor to three kings who had built monuments in the vicinity of the Second Pylon. Ramesses II was officially given credit for the Second Pylon, while Ramesses III had built a small temple just in front of the south wing of the Second Pylon
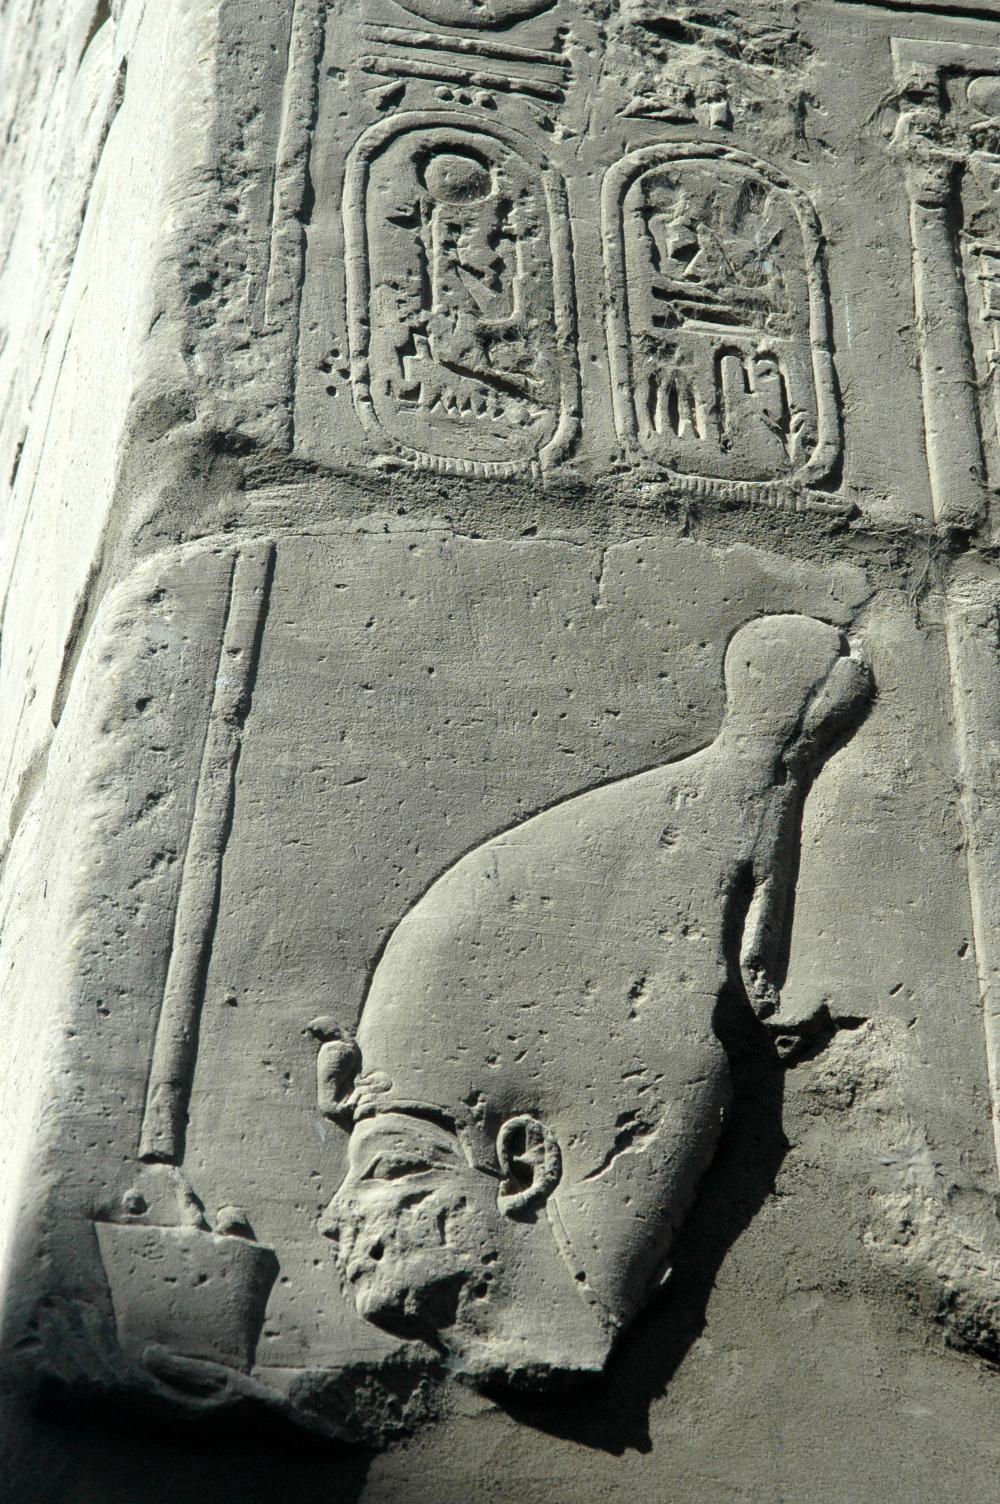
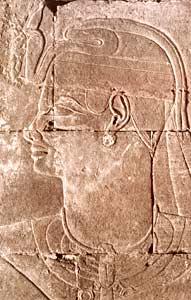
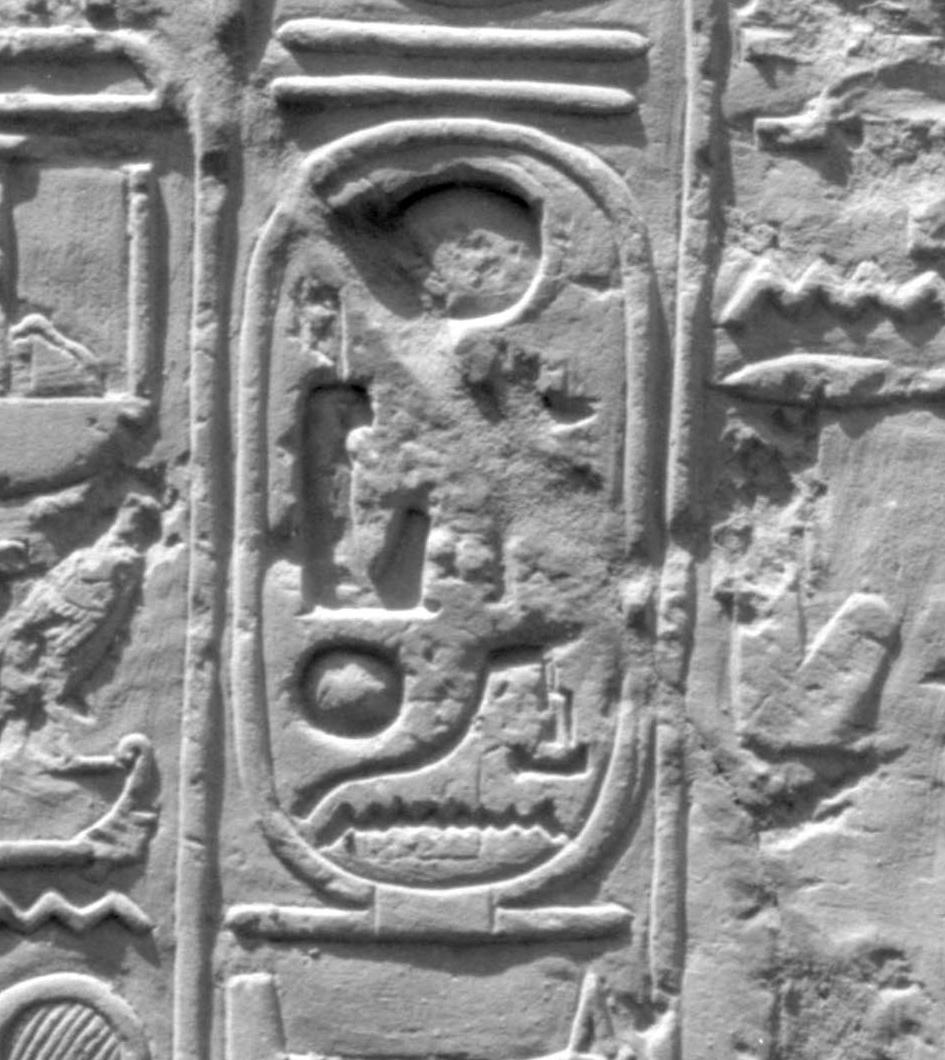
The Kushite pharaoh Taharqa (ca. 690-664 BCE) of the 25th Dynasty had built his "kiosk" of huge papyrus columns directly in front of the Second Pylon's gateway. But in Ptolemy's day, this kiosk had long since been usurped by another king, Psamtik II (ca. 595-589 BCE) of the 26th Dynasty, who replaced Taharqa's cartouches with his own. Ptolemy VI's homage to the Kushite king in the eastern passageway of the Second Pylon was unmistakable. Although the figure and cartouche of the ruler was badly eroded, the distinctive Kushite cap crown with its double cobra on the pharaoh's brow were clear.
When we first looked at the badly damaged cartouche above the king's head, we though we read the name of Psamtik II— exactly what we expected since Psamtik had usurped the kiosk of Taharqa, the monument that had inspired Ptolemy to place the earlier king's image here in the first place. Further examination of the cartouche convinced us, however, that the damaged relief should be read Taharqa. Only by seeing through Psamtik II's usurpation could Ptolemy VI have given the proper credit to Taharqa, showing that he was as good an epigraphist as any modern Egyptologist.
|