War Scenes of Seti I
|
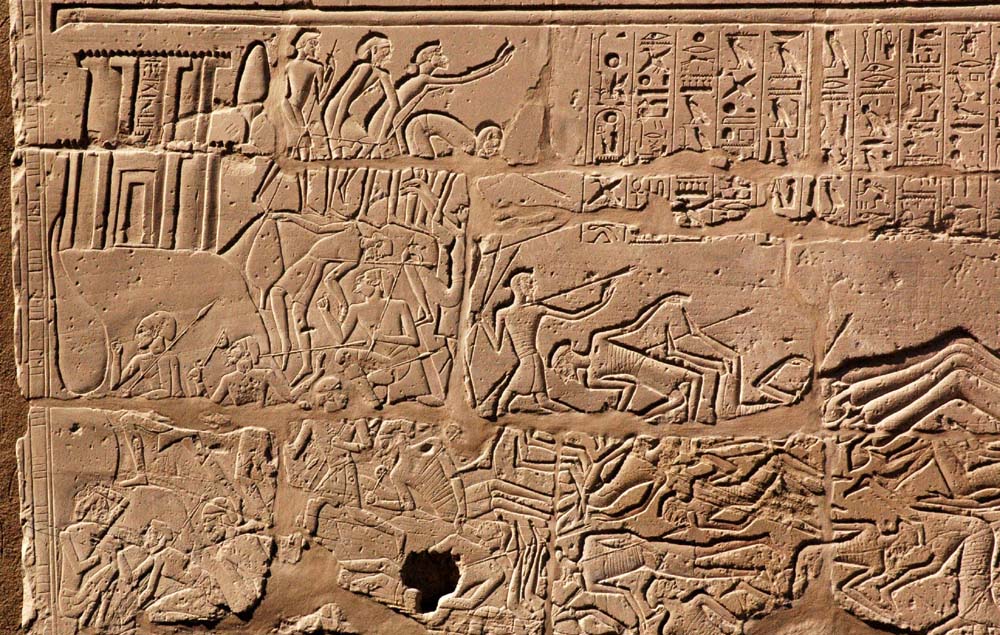
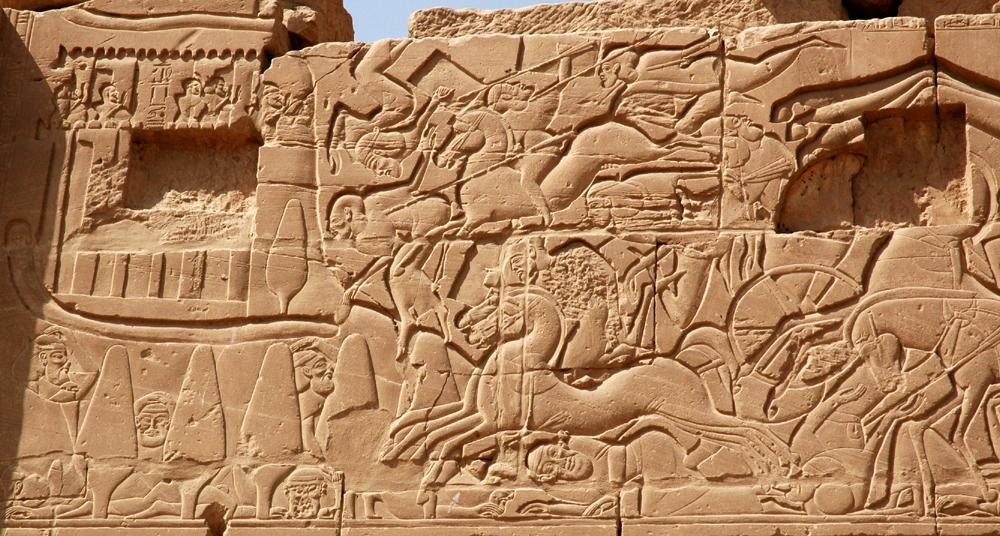
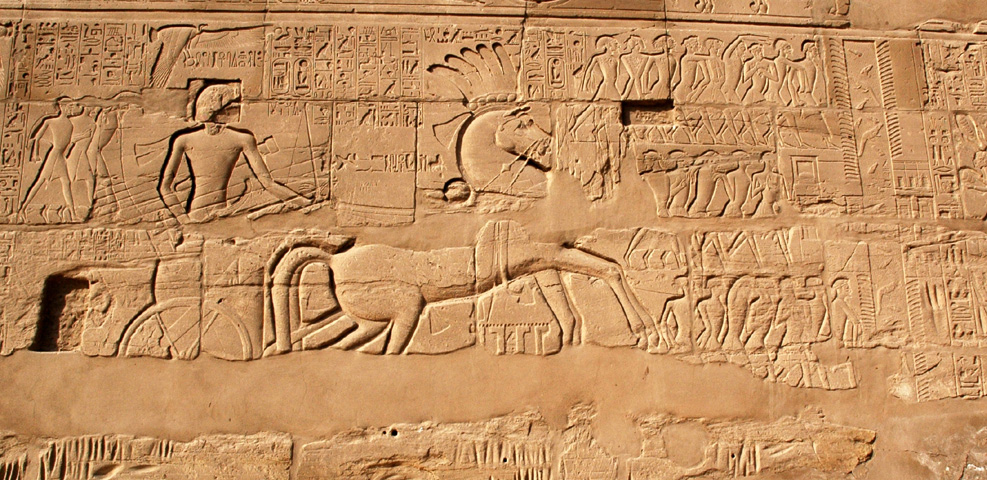
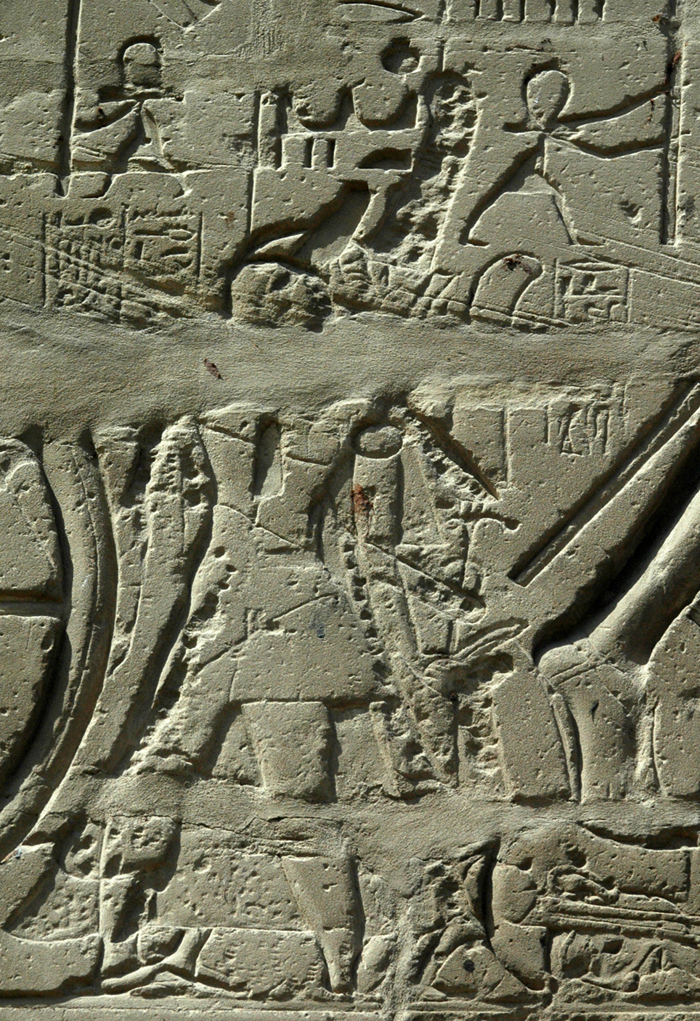
The whole northern exterior wall of the Karnak Hypostyle Hall is filled with a panorama of war scenes celebrating the military achievements of Seti I. The first of the great Ramesside war monuments, they set the artistic standard for Seti's predecessors, but their superb style and composition were never equaled.
The war scenes are our main source for Egypt's foreign relations during Seti's reign. The scenes are laid out in a symmetrical form on either side of the north gateway.
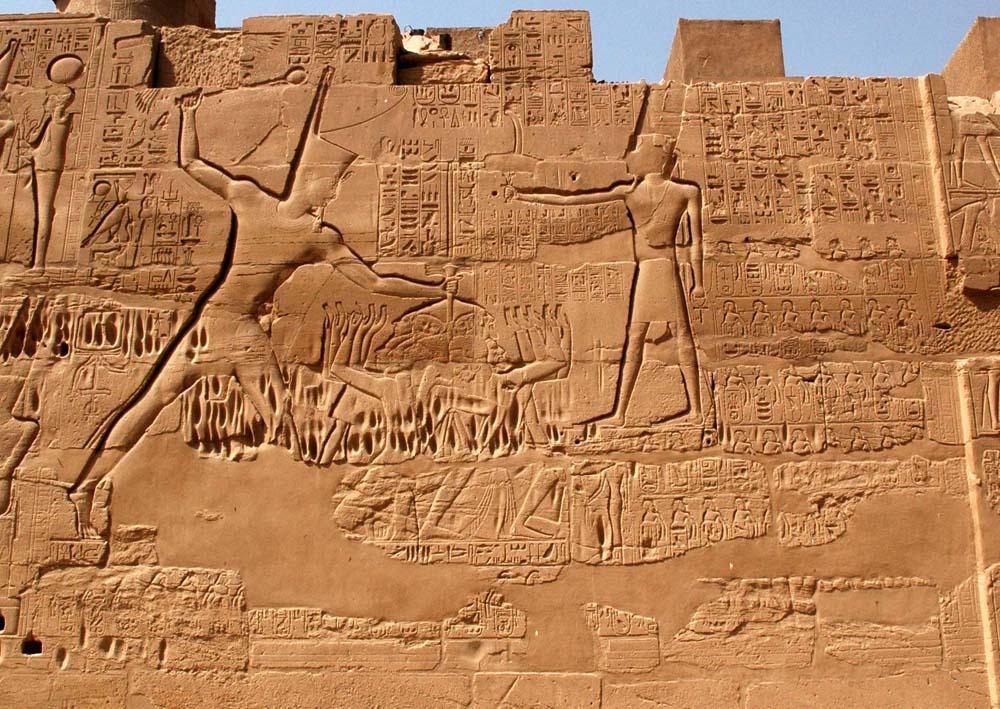
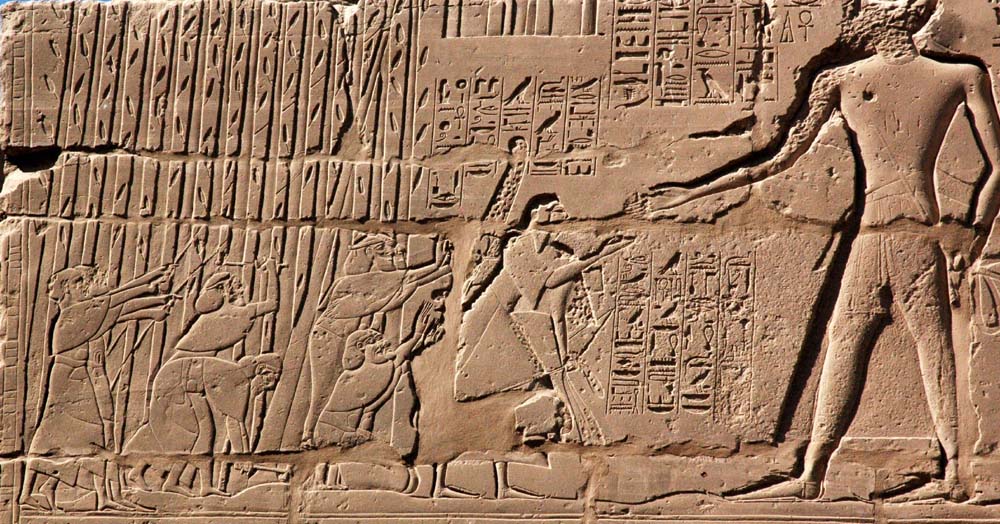
On both sides of the north gate are two huge scenes of the triumphant king smiting a group of prisoners with his mace in the presence of the god Amen-Re. The text above them is purely rhetorical. Of genuine historical interest are the two extensive lists of foreign place names. These are arranged in groups, each consisting of an oval with the upper body of a bound enemy prisoner emerging from the ovals. Inside the ovals-- which are not royal cartouches-- are the names of cities and countries in Western Asia and in Nubia. Some of the names are copied from earlier lists, others are original an may reflect the range of Seti's military campaigns. At some point, the Nubian names were replaced with locations in Syria perhaps reflecting the king's later wars there.
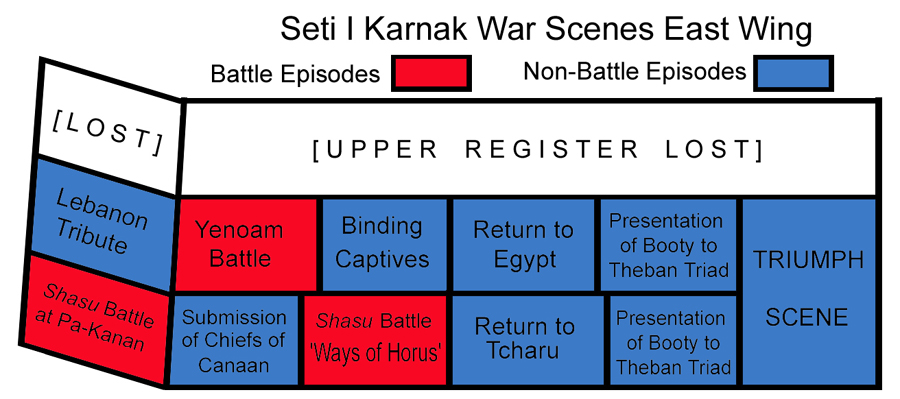
The eastern half of the north wall is dedicated to Seti I's campaign in his first year as king. The rhetorical texts claim that pharaoh received a report that: "The Shasu-bedouin are plotting rebellion. Their chiefs have gathered together in the hills of Kharu (= Syria-Palestine). They have fallen into chaos and are fighting and each one is slaying the other. They do not obey the laws of the Palace!" In response, Seti lead his army into Palestine across the north coast of the Sinai and into Gaza. This route was called "the Ways of Horus" by the Egyptians and it was a fortified military highway with a series of forts, each with a well. Recently, Egyptian archaeologists have discovered the site of the first and most important of these fortresses, the border town of Tcharu at the north-east corner of the Nile Delta.
After fighting a running battle with Shasu Bedouin who were never a serious threat to pharaoh's army, Seti arrived in Gaza and began the main part of his campaign of year one progressing north through Canaan all the way into Lebanon. After defeating the Shasu, the only real fighting shown was the attack on a town called Yenoam in Palestine. From two stelae the king left at Beth Shan, we know that he split his army into three divisions and sent them against the towns of Hamath and Beth Shan, presumably leading the third against Yenoam in person. These battles were won "in the space of one day" and must have been easy victories.
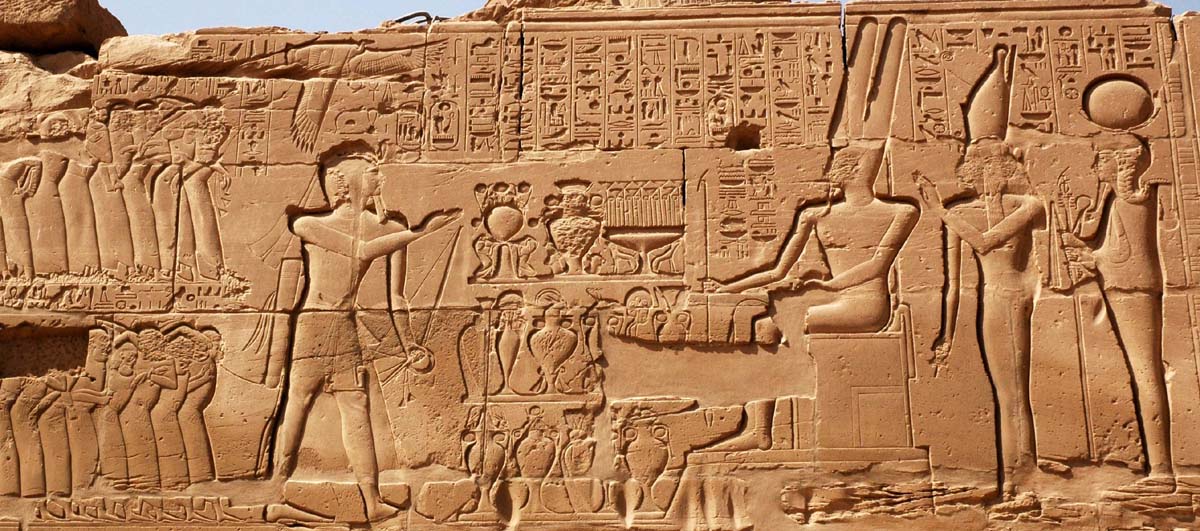
There are scenes devoted to the presentation of booty and prisoners to the god Amen-Re. The caption over one reads: "Presentation of tribute by His Majesty to his father Amen...consisting of silver, gold, lapis-lazuli, turquoise, red jasper and every sort of precious stone. The chiefs of the hill countries are in his grasp to fill the workshops of his father Amen." The hieroglyphic texts also record speeches by the god praising the king for his actions and gifts: "Welcome in peace. I make you victorious over every foreign land and set fear of you in the heart of the Nine Bows (= all foreign countries). Their chiefs come to you their tribute on their backs!"
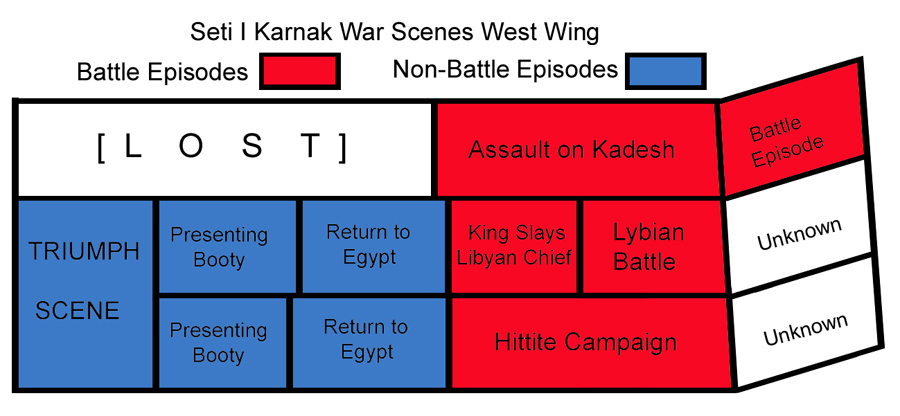
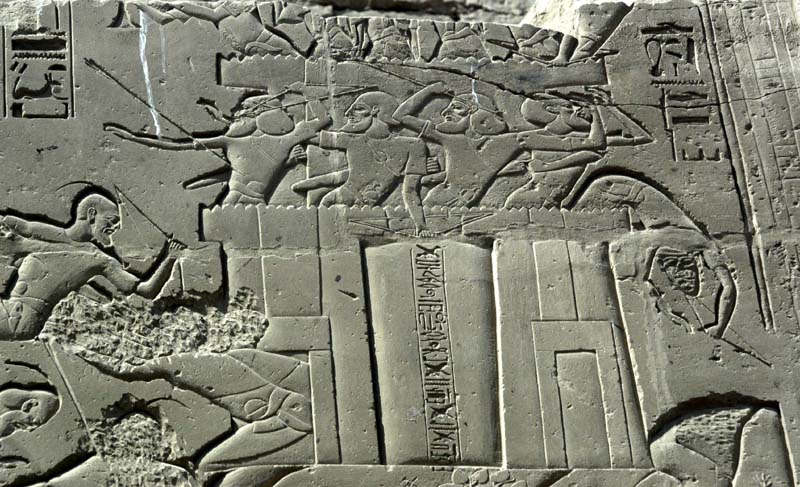
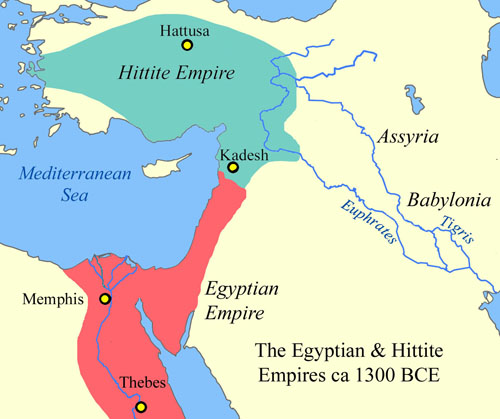
The war reliefs are arranged in three levels or registers of scenes. Unfortunately, nothing of of the top register on the east side survives. We do not know if it contained additional events of the year one campaign or an entirely different war, perhaps in Nubia. The western side of the north wall is dedicated to Seti I's later wars further north in Syria and to a battle with the Libyans on Egypt's north-west border. Only one scene from the top register survives, but fortunately it is the most important historically. Seti is shown attacking the Syrian town of Kadesh in the land of Amurru. Amurru was a costal kingdom in northern Lebanon and southern Syria. It has been in Egypt's possession several decades earlier, but was lost during the reign of Akhenaten when the Hittite Emperor Suppiluliuma captured it.
Kadesh seems to have been an obsession for Egyptian pharaohs of the New Kingdom. Egypt fought against the Hittite empire for nearly a century in order to regain its former northern border territory. Before Seti, two Egyptian attempts to regain Kadesh had failed including one at the very time Tutankhamen died. Later, Seti's son made his own failed bid to recapture Kadesh in year five, less than a decade after Seti's Kadesh campaign. Seti I, however, succeeded where other pharaohs did not. We know that he captured Kadesh, because of a victory stela in his name that was found there by French archaeologists. But Seti's victory did not last. Within a short time, Kadesh once again became part of the Hittite Empire, and Ramesses II would have to make another failed bid to claim it for Egypt.
Despite these military setbacks, the pharaohs of the New Kingdom should be given credit for their accomplishments. Coastal Syria was hundreds of kilometers north of Egypt's border, yet for generations, Egypt was able to project its military might far beyond the homeland, sending armies overland and even by sea up the Levant coast. An Egyptian army in Amurru was a long way from home. The Hittites, based in eastern Turkey, were on their front doorstep. Seti probably faced a smaller, local force at Kadesh. In his next war, his foe was the Hittite imperial army. As before, however, Seti I's army was the victor. His forces even killed the king of Carcamish, a Hittite royal prince who ruled Syria on his father's behalf. Unfortunately for Seti, the Hittites still had the upper hand. Once pharaoh and his armies went home, only a small garrison of Egypitan soldiers was left behind. The Hittites quickly recovered their losses in Amurru.
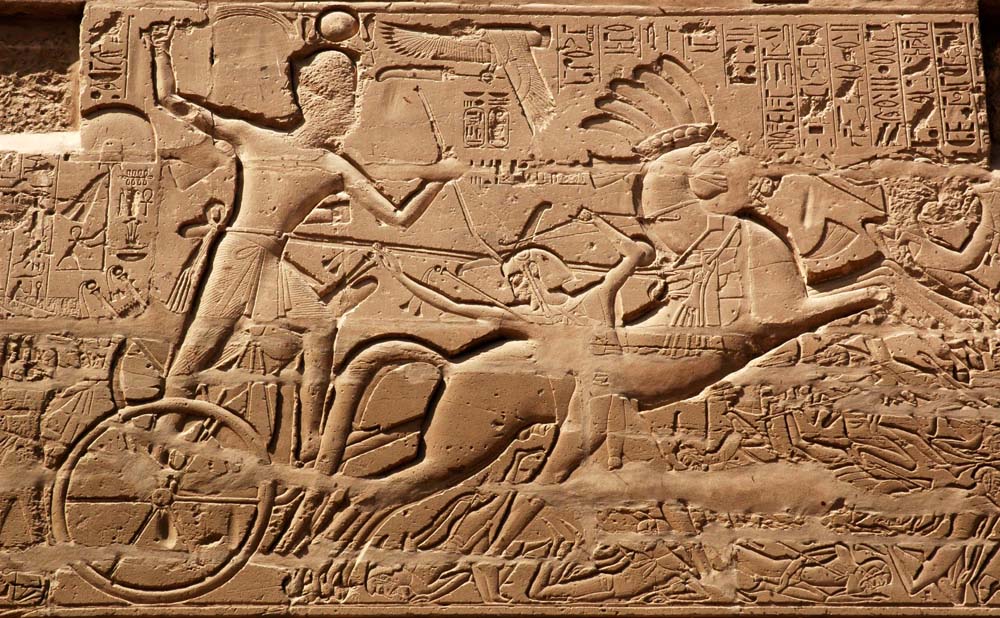
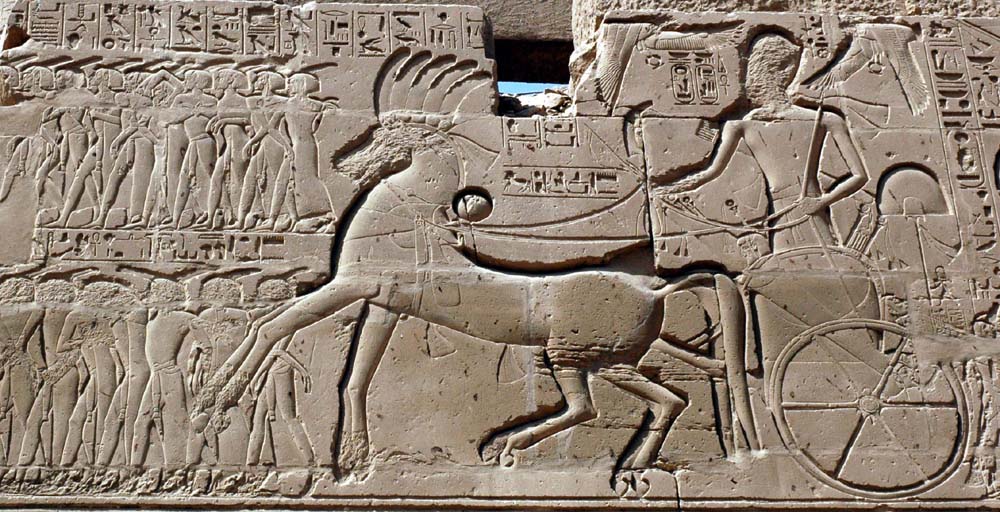
The final episode in Seti I's war scenes is found on the middle register on the west side, between the Kadesh campaign at the top and the Hittite campaign at the base of the wall. These reliefs are especially well preserved and show off the artistry of pharaoh's sculptors well. In one scene, the king skewers a Libyan chief with a javelin with one foot placed over the cab of his chariot, resting on the pole connecting it to the horses! Needless to say, a great deal of artistic license is involved.
Seti's victory over the Libyans was the first of a series of wars on that front during the 19th and 20th Dynasties. His grandson Merenptah and later Ramesses III would face increasingly larger forces of Libyan invaders.
Everywhere in Seti's war reliefs, it is the king alone who defeats the enemy single-handed. The Egyptian army is nowhere to be seen. Except for a welcoming delegation of officials and priests, only one other Egyptian appears. A small figure stands behind the pharaoh in some of the battle scenes.
Texts identify this person as none other than Crown Prince Ramesses! But even the casual observer will note that something strange is going on in these reliefs. There is clearly another figure with a different name over which Ramesses II later carved his own name and image. For decades, it was thought that this shadowy figure was a disgraced or even a murdered elder brother of Ramesses. The Epigraphic Survey discovered the truth. The man was a military officer named Mehy. Mehy was only a mid-level officer, but he bore high honorific titles. Like Prince Ramesses figure, his figure had been added after the war scenes were completed. Who he really was and why he is there remain a mystery.
|

