Registration Quick Guide
Here is a brief guide to online class registration. Other resources available are:
Registration: Basic Steps
- Login to the myMemphis portal with your Username and Password, the same combination used for UofM email. (If you
have trouble getting into the portal, call the Helpdesk at 901.678.8888.)
- Select the Registration and Records tile on the Student page. Here are links to Prepare for Registration, Look Up Classes, and Register for
Classes, among others.
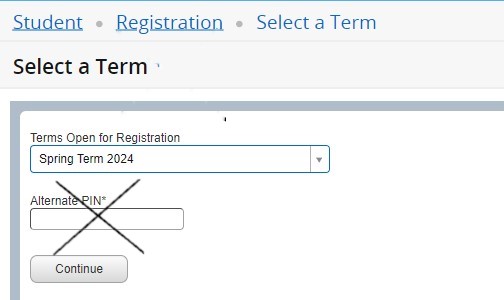
- When selecting any of the registration functions, you will be prompted for a Term. Select the desired term and then click Continue.
Prepare for Registration
Click on Prepare for Registration. This will take you to Registration Status information. Use this screen to:
- Determine if you have any holds that prevent registration. You cannot register if
you have a registration hold.
A hold you will see each term is the Financial Responsibility hold. For the Financial Responsibility hold, you will need to acknowledge the financial responsibility statement. The Complete pre-registration acknowledgements (if any) link will take you directly to the acknowledgements site. Or, copy and paste the Reason to Fix URL (http://sa.memphis.edu/) in a new browser window. Click the Financial Responsibility button and then the Acknowledge button.
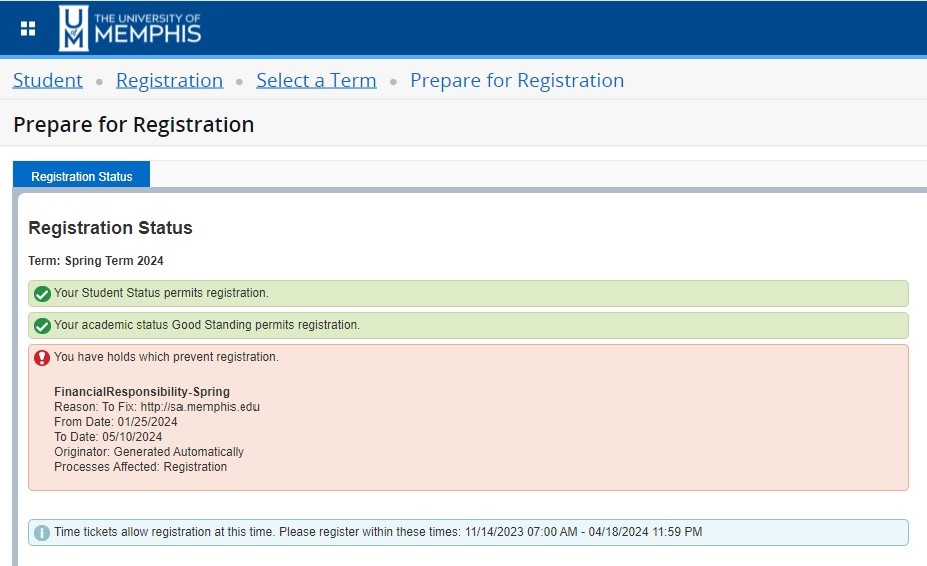
- Verify your earliest date to register.
- Check for any permits issued to you. If you have a permit, make note of the CRN associated with the permit.
Look Up Classes
Click on Look Up Classes to check out course offerings. Select options to refine your search, then click Search button at the bottom of the screen.
- Using the Advanced Search options, you can narrow or tailor your results (for example: courses offered at a particular campus, or online courses only, or courses taught by a particular instructor). Refer to Popular Lists to see what's possible, and experiment!
- When the results are displayed, make note of the CRNs of courses/sections you want.
Register for Classes (add or drop classes)
Click on Register for Classes (add or drop classes) to register. You can use the Find Classes tab to search for classes, or you can use the Enter CRNs tab to enter CRNs directly.
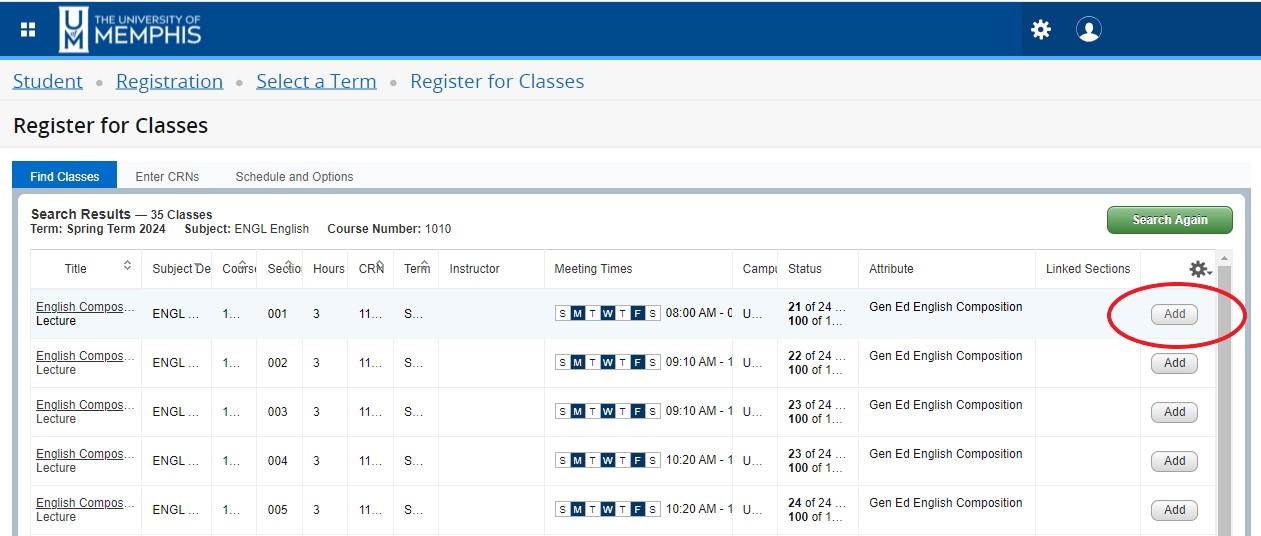
Find Classes tab
- You may enter more than one Subject.
- You may include a Course Number. This is a four digit number (e.g., 1010, 1020), not the five-digit CRN.
- Click Search.
- Results can be sorted to your personal preference by clicking the column headers. You can also remove any unnecessary columns by clicking the Gear icon.
- Locate the section you want, and click Add.
- The course will be added in the Summary panel. Click Submit in the Summary panel to attempt registration.
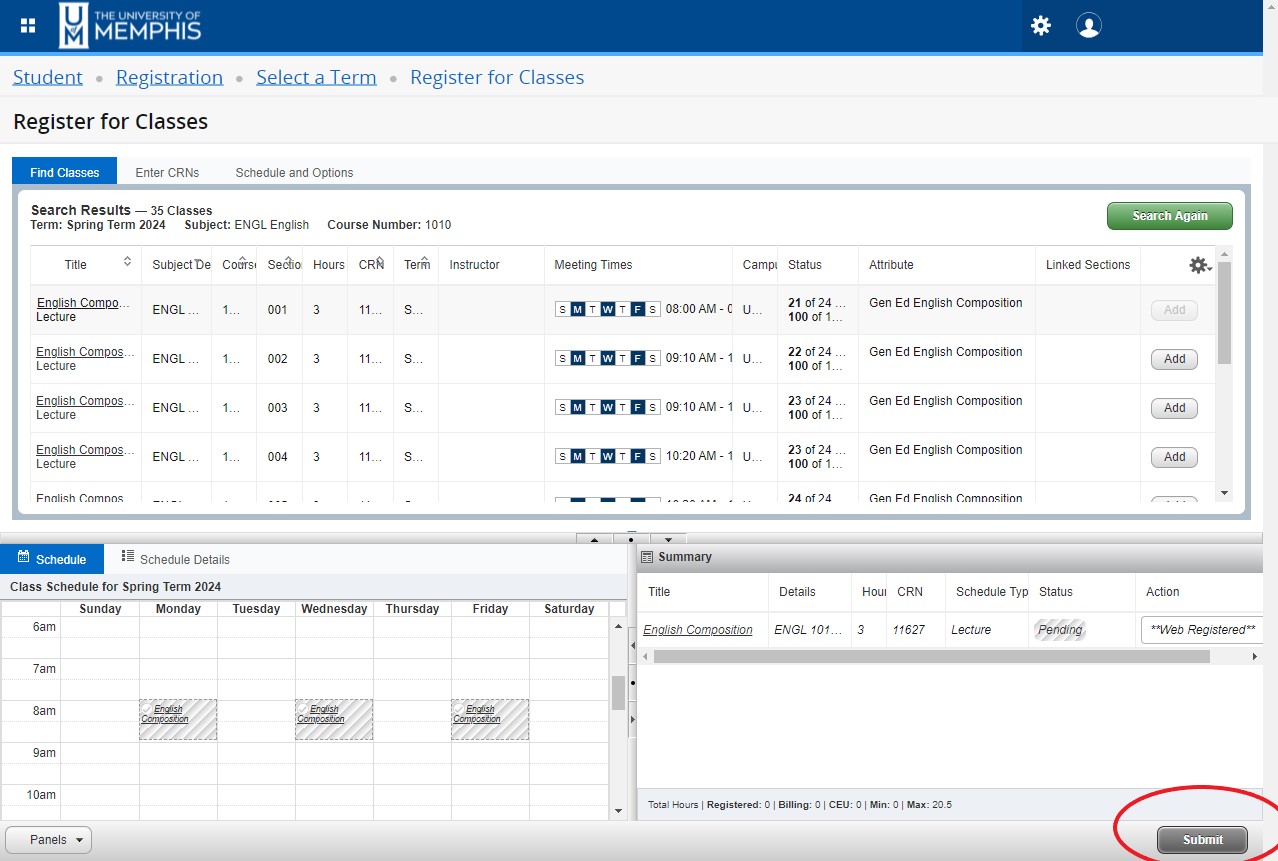
- Once registered, under Status, you will see Registered in green to indicate that you are registered in the course. You will also see the class with a green checkmark in the Schedule panel.
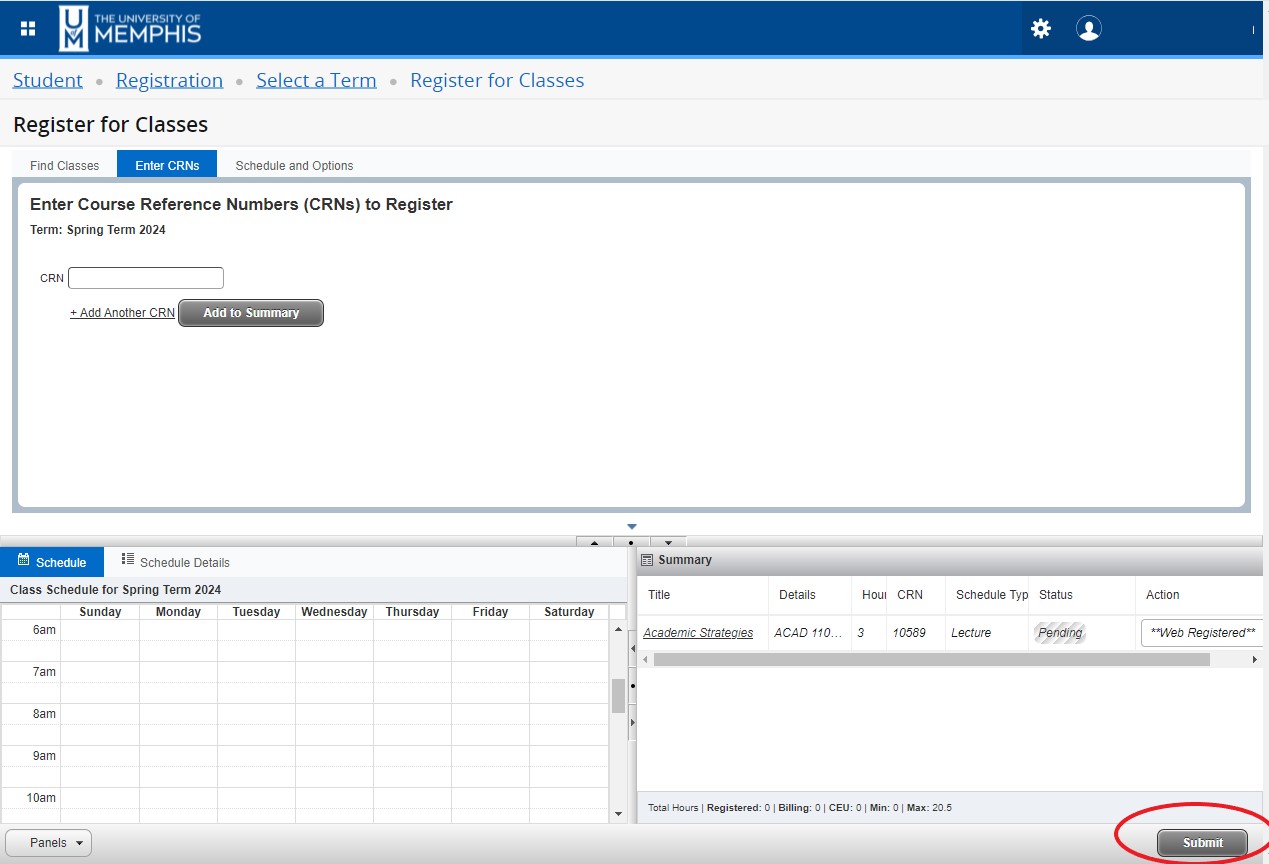
Enter CRNs tab
- Enter a CRN in the CRN box.
- You may enter additional CRNs by clicking Add Another CRN.
- When you are finished entering CRNs, click the Add to Summary button.
- The courses will be added in the Summary panel. Click Submit in the Summary panel to attempt registration.
- Once registered, under Status, you will see Registered in green to indicate that you
are registered in the course. You will also see the class with a green checkmark in
the Schedule panel.
Note: All degree seeking students must be advised. If you are degree seeking but have not been cleared by your advisor to register, You will see the Alternate PIN field. Do not enter anything in this field. Logout and then contact your advisor. Only your advisor can clear the Alternate PIN requirement.
Drop Classes
- The Summary panel of Register for classes is also where you will go to drop classes if you would like to make a change in your schedule. Select the appropriate action from the dropdown and click Submit.
Registration Errors
- Courses you did not successfully register for will have the message Errors Preventing Registration under Status. Hover over the message to get a brief explanation of the problem. An error will also create a notification in the upper righthand corner.
- Refer to this list of common error messages.
- Adjust your classes as needed.
View Student Schedule
View the Student Schedule page for more information about viewing your schedule.
